
How the Best Hat Embroidery Digitizing Services Handle Curved Caps
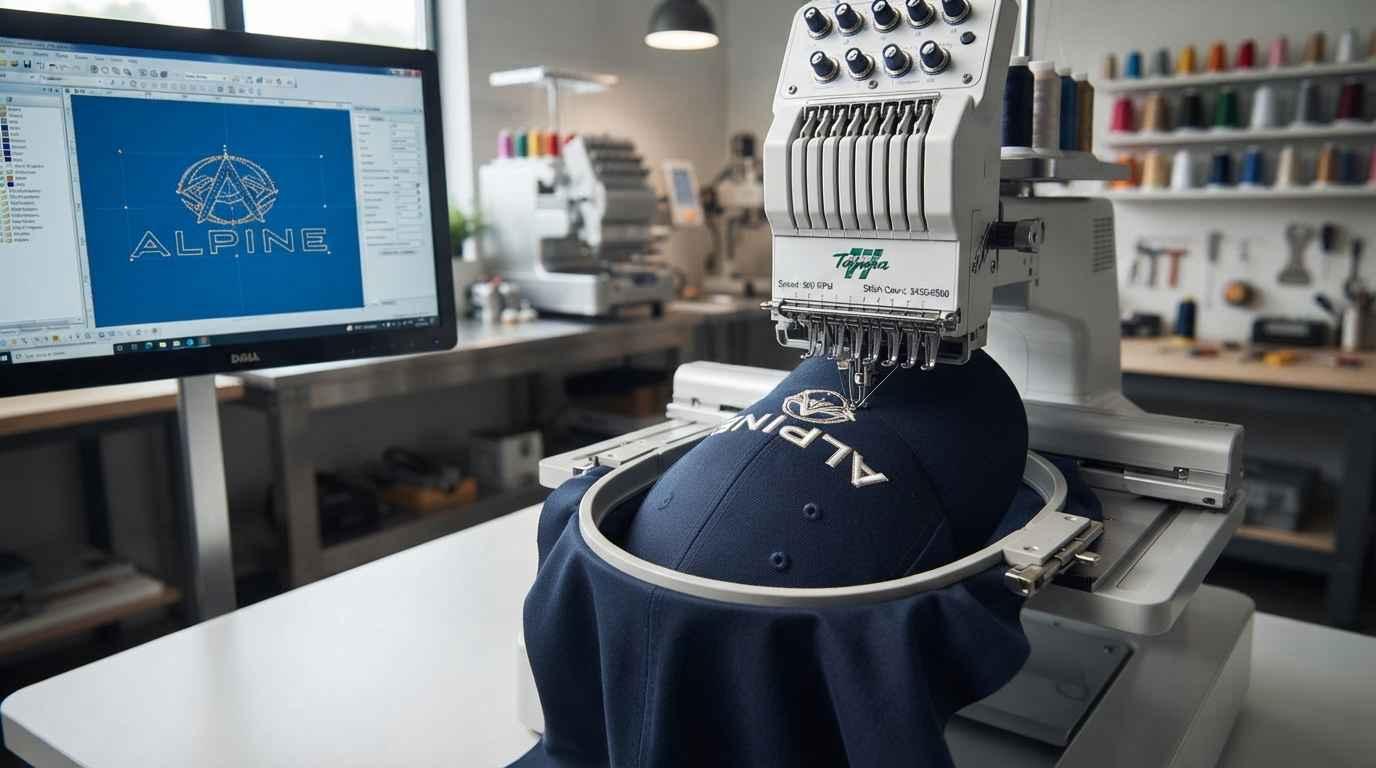
Embroidery on curved caps requires careful planning because the design is stitched onto a surface that does not remain flat. Unlike a flat garment panel, a cap can introduce changes in stitch direction, registration, density, and placement as the needle moves across its curved front. Best Hat Embroidery Digitizing Services account for these challenges when preparing artwork so the embroidery file is suitable for the physical structure of the cap.
Understanding how curved-cap digitizing works can help apparel businesses, embroidery shops, and custom cap producers prepare designs that are more appropriate for machine embroidery.
Why Curved Caps Require Special Digitizing
The curved front of a cap creates different embroidery conditions from a flat fabric surface.
As the design moves from the center toward the sides, the surface changes direction. This can affect how stitches lie against the material.
A design that appears correct on a flat digital preview may not produce the same appearance after being stitched onto a curved cap.
Professional digitizing therefore considers the cap's shape before determining stitch direction, density, underlay, sequencing, and design placement.
How the Cap Structure Affects Embroidery
Caps can have structured or unstructured construction, different front panels, seams, backing materials, and varying levels of stiffness.
The front panel is particularly important because this is where many cap logos are placed.
A digitizer should understand how the material behaves under the needle and where seams or structural elements may affect the embroidery area.
The design may need adjustments depending on whether it is being placed directly across a curved front, near a seam, or on another section of the cap.
Design Placement on Curved Caps
Placement is one of the first considerations when preparing a cap embroidery file.
A design positioned too close to a seam or an unsuitable part of the curved surface may be difficult to stitch consistently.
The center of the front panel often provides a more predictable area, but the exact placement depends on the cap construction and intended appearance.
Professional preparation considers the available embroidery field rather than simply resizing the original logo to fit a rectangular workspace.
Managing Stitch Direction
Stitch direction can have a significant effect on how embroidery behaves across a curved surface.
If all sections of a design use the same stitch angle, the finished embroidery may not follow the visual structure of the artwork effectively.
A digitizer can change stitch angles between different design elements to create better coverage and separation.
For example, lettering, borders, and larger filled areas may use different stitch directions depending on their shapes and positions.
Using Appropriate Underlay
Underlay provides support beneath the visible embroidery stitches.
On caps, appropriate underlay can help stabilize the material and provide a foundation for the upper stitches.
The amount and type of underlay should be selected according to the fabric, design structure, stitch type, and embroidery size.
Too little support can contribute to instability, while excessive underlay can increase thread buildup.
Professional digitizing aims to balance support with the physical characteristics of the cap.
Adjusting Stitch Density
Curved-cap embroidery also requires attention to stitch density.
A high stitch count in a small area can create excessive thread accumulation. This may make the design heavier and can affect the flexibility of the fabric.
On the other hand, insufficient density may produce weak coverage or allow the cap material to show through.
Density should therefore be considered in relation to the fabric, thread, stitch type, and design dimensions.
Compensating for Fabric Movement
Fabric can shift or react to stitching during embroidery.
This can affect the alignment of different elements, particularly when the design contains several adjoining sections.
Digitizing techniques such as appropriate underlay, stitch sequencing, pull compensation, and careful density selection can help account for expected fabric behavior.
Pull compensation can be particularly relevant where stitches may cause narrow shapes or lettering to become slightly smaller during production.
Pull Compensation on Curved Designs
Pull compensation refers to adjustments made to account for the way fabric and stitches interact during embroidery.
Without suitable compensation, some elements may not maintain their intended dimensions after stitching.
A skilled digitizer evaluates areas where the fabric may pull inward and adjusts the embroidery structure accordingly.
The exact settings depend on the material, design, stitch type, and machine conditions.
Handling Cap Seams
Cap seams can create additional challenges because they introduce physical boundaries within the embroidery area.
Large designs that cross directly over a seam may encounter changes in material thickness and stability.
For this reason, the placement and construction of the design should be evaluated before digitizing.
If crossing a seam is unavoidable, the digitizer may need to modify stitch sequencing and other settings to accommodate the change in the surface.
Why Stitch Sequencing Matters
The order of stitching can affect registration, thread changes, jumps, and the overall production process.
On a curved cap, sequencing should be planned carefully because the material can respond differently as different sections are stitched.
A logical sequence can help reduce unnecessary movement and support more consistent alignment between design elements.
The exact sequence depends on the artwork and its construction.
Small Details on Curved Caps
Small details can become difficult to reproduce when a design is placed on a cap.
Tiny gaps, thin lines, and miniature lettering may not translate effectively into stitches, especially when the design is positioned on a curved surface.
A professional digitizer may simplify certain elements or adjust their dimensions so the important visual information remains clear.
This is particularly important for business logos containing small text or fine graphic details.
Managing Hat Lettering
Lettering requires careful attention because readability can decrease when text is too small or contains thin strokes.
Fonts designed for embroidery generally need sufficient stroke width and spacing to produce readable results.
When converting a logo for a curved cap, a digitizer may need to modify letter spacing, size, or stitch structure while keeping the wording intact.
Testing the lettering at the actual production size is useful for identifying potential problems.
Choosing the Right Stitch Types
Different areas of a cap design may require different stitch types.
Satin stitches can work well for suitable borders and lettering, while fill stitches can cover larger shapes. Running stitches may be useful for narrow lines or fine details.
The stitch type should correspond to the shape and size of each element.
Using appropriate stitch structures can help manage coverage and thread behavior across the curved surface.
Design Size and Cap Dimensions
The size of the embroidery should be determined according to the available area of the cap.
A design that is too large may interfere with seams, edges, or structural features. A design that is too small may lose important details.
Professional digitizing involves checking the artwork against the actual embroidery dimensions before finalizing the stitch file.
Customers should provide the desired width and height whenever possible.
How Different Cap Materials Affect Digitizing
Not every cap fabric behaves the same way.
A rigid structured cap may respond differently to stitching than a softer or more flexible material.
Similarly, fabrics with different surface textures can influence how stitches appear.
The digitizer should consider the material when determining density, underlay, stitch length, and other settings.
Providing information about the cap fabric can therefore improve the preparation process.
Testing the Design Before Production
A digital embroidery file can provide useful information, but a physical sample can reveal issues that are not obvious on a computer screen.
A test stitch-out can help evaluate:
- Design placement
- Lettering readability
- Stitch coverage
- Registration
- Thread buildup
- Fabric response
- Overall appearance
If changes are needed, the digitizing file can be adjusted before the design enters larger production.
What to Provide to a Digitizer
Clear project information can make curved-cap digitizing more efficient.
Ideally, provide the original artwork, intended dimensions, cap type, material information, placement requirements, thread colors, and machine format.
If the design will cross a seam or be placed in an unusual location, that information should also be communicated before digitizing begins.
The more accurately the production requirements are described, the easier it is to prepare a suitable embroidery file.
Common Problems With Poorly Digitized Curved-Cap Designs
Poor preparation can contribute to several embroidery issues.
These may include distorted lettering, uneven coverage, excessive thread buildup, poor registration, unnecessary thread changes, and details that disappear after stitching.
Some problems are caused by the digitizing file, while others can result from hooping, machine settings, needle selection, thread, cap construction, or production technique.
For this reason, diagnosing embroidery problems should consider the complete production process rather than the digitizing file alone.
How Professional Digitizing Supports Production
Professional digitizing is not simply about converting an image into stitches. It involves making production-focused decisions about how the design should be constructed for a specific material and application.
For curved caps, this includes considering surface shape, stitch direction, density, underlay, compensation, sequencing, seams, and design dimensions.
These factors can help create a file that is better suited to the physical conditions of cap embroidery.
Conclusion
Curved caps require a different approach from flat embroidery because the surface changes direction and can affect how stitches interact with the material. The best hat embroidery digitizing services account for cap construction, placement, stitch direction, density, underlay, pull compensation, lettering, sequencing, and other production factors when preparing a design.
Providing clear artwork and accurate cap specifications can also help the digitizer create a more suitable file. EMDIGITIZING can be considered when professional preparation is needed for custom curved-cap embroidery projects.
FAQs
Q1. Why is curved-cap embroidery more difficult than flat embroidery?
The cap surface changes direction, which can affect stitch placement, registration, density, and the way different design elements appear after stitching.
Q2. Does curved-cap digitizing require special stitch settings?
It may require adjustments to stitch direction, density, underlay, compensation, sequencing, and other settings depending on the artwork and cap material.
Q3. Why is stitch direction important on a curved cap?
Different stitch directions can help accommodate the shape of the design and the changing surface of the cap.
Q4. Can small lettering be embroidered on curved caps?
Yes, but very small lettering can be difficult to reproduce clearly. Letter size, font structure, stitch type, and fabric all affect readability.
Q5. What is pull compensation in hat embroidery?
Pull compensation involves adjusting certain design elements to account for the effects of stitching on the fabric and maintain more accurate dimensions.
Q6. Should embroidery designs cross cap seams?
It depends on the design and cap construction. Seams can create changes in thickness and stability, so the design should be evaluated before placement.
Q7. Why is a test stitch-out useful?
A sample can reveal issues with placement, registration, lettering, coverage, thread buildup, and fabric response before larger production begins.
Q8. What information should I provide for curved-cap digitizing?
Provide the artwork, desired dimensions, cap type, fabric information, placement details, thread colors, and required embroidery file format.
Q9. Can any logo be digitized for a curved cap?
Most logos can be prepared for embroidery, but some details may need to be simplified or adjusted according to the design size, cap surface, and embroidery limitations.

 English
 Arabic
 French
 Spanish
 Portuguese
 Deutsch
 Turkish
 Dutch
Dutch
 Italiano
 Romaian
 Portuguese (Brazil)
 Greek
Greek